Many venues track guest spend in external apps or spreadsheets while still relying on TablelistPro as the source of truth for CRM. Manual receipts let you backfill that history so customer profiles stay accurate — without creating fake reservations.
Use receipts to:
- Import or reconcile spend from another system
- Record legacy POS or off-platform visits that never synced
- Bump lifetime spend when you only care about dollars, not visit count
- Add a real visit when the guest actually came in but there is no Tablelist booking
Open the sidebar, click Customers, open a profile, then scroll to Receipts.
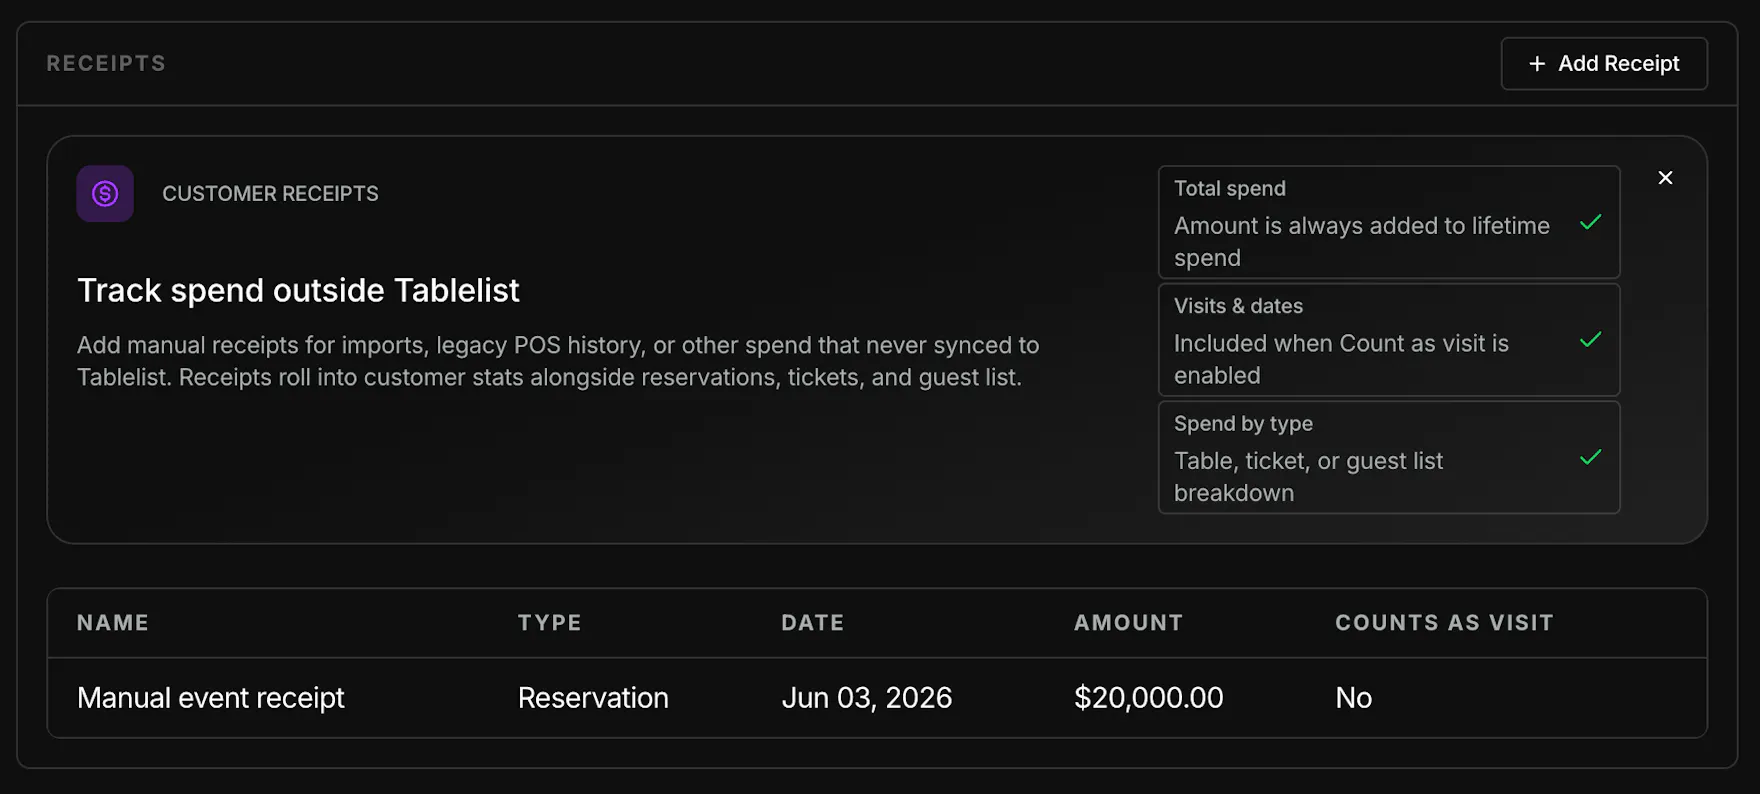
The Customer receipts callout explains how entries affect stats:
- Total spend — The amount is always added to lifetime spend.
- Visits & dates — Included only when Count as visit is enabled.
- Spend by type — Counts toward reservation, ticket, or guest-list breakdowns based on Order Type.
Spend only vs. count as a visit
Each receipt has a Count as visit checkbox. Use it to match what actually happened:
| Goal | Count as visit |
|---|---|
| Update spend totals only (threshold tracking, imports, comps logged elsewhere) | Leave unchecked |
| Record a real night out — increases visit count and can update Last Visit | Checked |
Example: a $20,000 event logged from a spreadsheet might count toward Total Spend but not as a visit if it was aggregated data, not a single check-in. A guest who dined in but has no reservation in Tablelist would use Count as visit so Total Visits and Last Visit stay correct.
Add a receipt
- On the customer profile, in Receipts, click Add Receipt.
- Complete the form and click Save.

| Field | Purpose |
|---|---|
| Name | Short label (required) — e.g. Manual event receipt |
| Date | When the spend occurred |
| Order Type | Reservation, Ticket, Guest List, or Tally — drives spend-by-type reporting |
| Amount | Spend for this entry (venue currency) |
| Description | Optional internal notes |
| Count as visit | Whether this row counts as a visit (see above) |
Saved receipts appear in the table: Name, Type, Date, Amount, and Counts as visit (Yes / No).
Edit or delete
- Click a row to open Edit Receipt, change fields, and Save.
- On an existing receipt, open the ⋯ menu and choose Delete. Removing a receipt recalculates that customer's lifetime stats.
Bulk import via API
For large backfills — spreadsheets, legacy POS exports, or migrations — use the TablelistPro API instead of entering receipts one by one in the app. Call Create customer receipt once per row (your script or integration loops over customers and receipt data).
Setup
- Create an organization API key under Settings → Developers → API Keys. See API keys.
- Use each customer's id (UUID) from CRM or the Customers API as
{customerId}in the path.
Request — POST https://api.tablelist.com/2025-03/customers/{customerId}/receipts
Send your API key in the x-tl-api-key header.
| API field | Matches the form |
|---|---|
name | Name (required) |
date | Date (optional, UTC) |
description | Description |
amount | Amount (venue currency, ≥ 0) |
orderType | Order Type — TABLE (reservation), TICKET, GUEST_LIST, TALLY |
countAsVisit | Count as visit |
The API returns the updated customer object (same stats rules as the Customer receipts callout on the profile). Full request and response details are in the API reference.
Related articles
- Customers — list, profile, and order history
- Tagging customers in CRM
- API keys — credentials for bulk receipt import