Build and manage visual floorplans for your venue — table placement, sections, and layout images that power reservations and the live customer map.
Open the sidebar, click Settings, then Floorplans.
Floorplans list
Select a floorplan to edit, or create a new one.
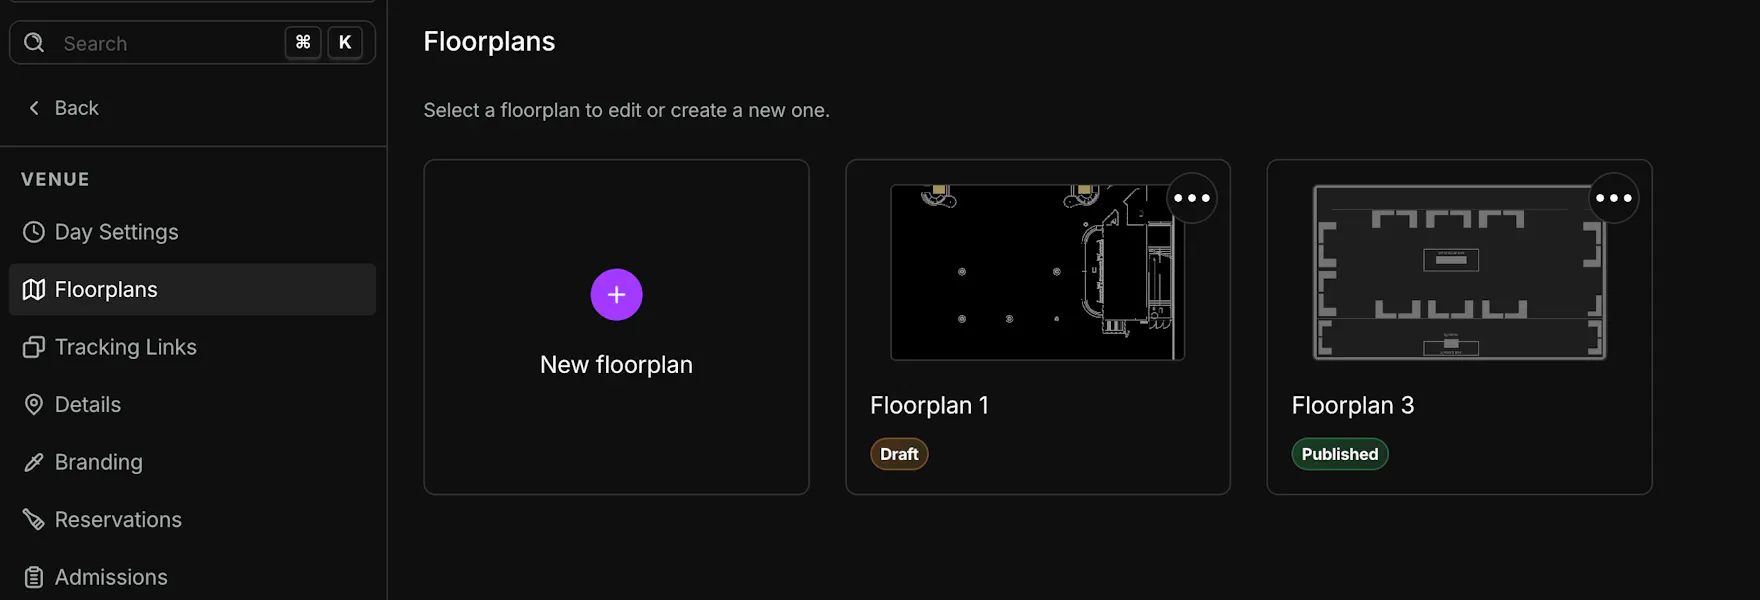
- New floorplan — First card with the + button. Opens the create dialog.
- Floorplan cards — Preview thumbnail, name, and status badge (Draft or Published).
- Open — Click a card to open the editor.
- Reorder — Drag a floorplan card and drop it on another to change display order.
- Delete — Use the ⋯ menu on a card, then Delete. Deletion is permanent.
Draft means the layout is not live on the customer map. Published means it is visible when that floorplan is in use.
Create a floorplan
- Click New floorplan.
- In Create new floorplan, enter a Name (for example,
Main Floor). - Upload a Floorplan image — your venue blueprint or seating diagram. We recommend 600 × 1000 pixels.
- Click Create. You are taken straight into the editor.
Need a clean background image? Tools like Canva work well for tracing your layout before upload.
Some venues see a Template option instead of an image upload when the newer floorplan builder is enabled. Pick a starting template, then refine rooms, objects, and tables in the editor.
Edit a floorplan
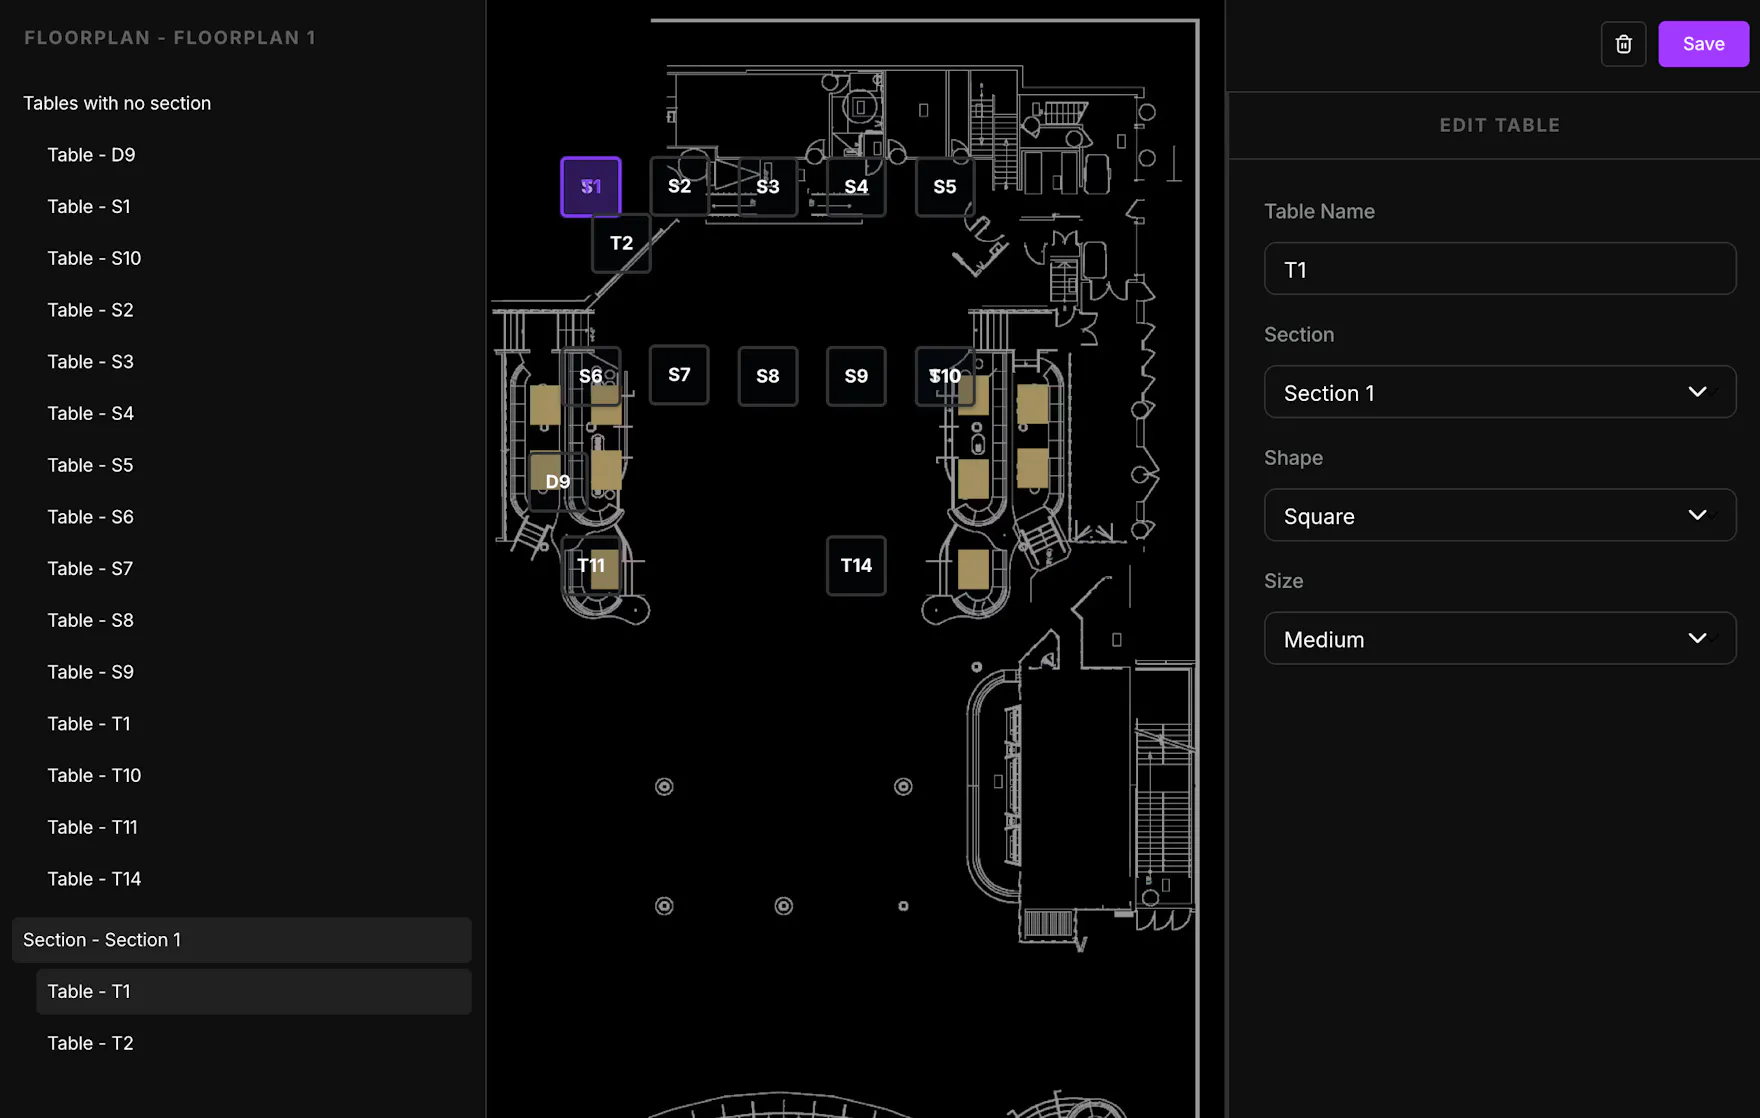
The editor has three areas: a table list on the left, the floorplan canvas in the center, and settings on the right.
Left sidebar — tables and sections
- Floorplan - {name} — Click to edit floorplan-level settings (name, publish state, background image).
- Tables with no section — Tables not assigned to a section.
- Section - {name} — Tables grouped by section. Click a section row to edit the section.
- Table - {name} — Click a table row to edit it in the right panel. Drag a table row onto a section to move it.
Canvas
Your uploaded image appears as the background. Table markers show on top.
- Add Section / Add Table — Toolbar above the canvas.
- Move tables — Drag a table on the canvas to reposition it. Click a table to select it and open Edit Table.
Right panel
- Save — Applies changes for the item you are editing (floorplan, section, or table).
- Delete (trash) — Available when editing the floorplan itself; removes the entire floorplan.
Edit floorplan
- Layout name — Display name on the list and in the sidebar.
- Published — When on, this layout can appear on the live customer map. Turn off to keep it as draft.
- Floorplan image — Replace or update the background image (600 × 1000 pixels recommended).
Edit section
- Section name
- When creating a section: Number of tables and Table prefix (optional, up to 3 characters) for auto-generated table names.
Edit table
- Table name
- Section — Assign to a section or leave unsectioned.
- Shape — Square or Round
- Size — Small, Medium, or Large
Click Save after each set of changes.
Related articles
- Venue Details — contact info and timezone (Settings → Details)