Add reservations from web or mobile to keep your floor and guest flow synced in real time.
Web
Open the sidebar, click Reservations, select the date, then click +.
In list view, click Columns to choose which reservation table columns show. You can hide columns you do not need and reorder the table for your team's workflow.
The reservation slide-out opens on the Details tab.
- Under Customer, click Change Customer.
- Search for the guest. If they're new, create a customer profile, then select them.
- Choose the Date and Event.
- Enter the Guest Count for unisex, male, and female guests. The total updates as you type.
- Select the Location tables and Server if your venue uses them.
- Add either Minimum Spend or Minimum Bottles.
- Set the Arrival Time.
- Choose an Attribution source if you track who booked the reservation.
- Mark the reservation Comped if needed, then choose a Comp Type.
- Add Notes, Reservation Tags, or Customer Tags.
- Leave Send reservation confirmation email checked if you want the guest to receive a confirmation.
- Click Save.
After saving, reopen the reservation to manage details, payment links, POS orders, chat, and history.
Mobile
Open the Reservations tab and pick the date. Tap +.
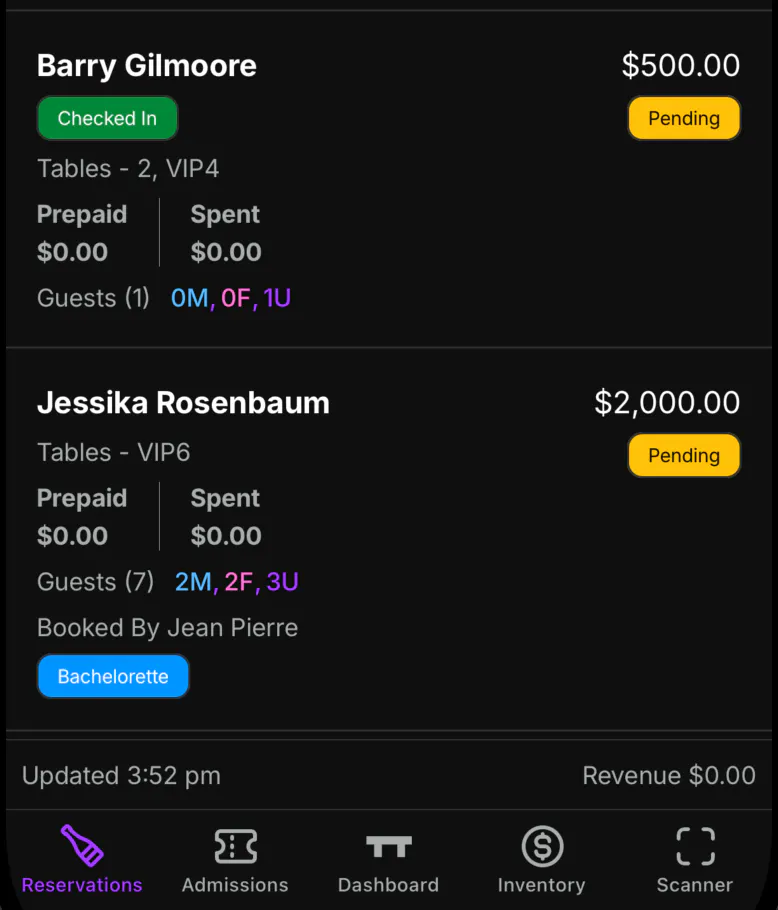
Each row shows the guest, a status badge, assigned tables, Prepaid and Spent, guest counts, Booked By, and tags. The minimum is on the right.
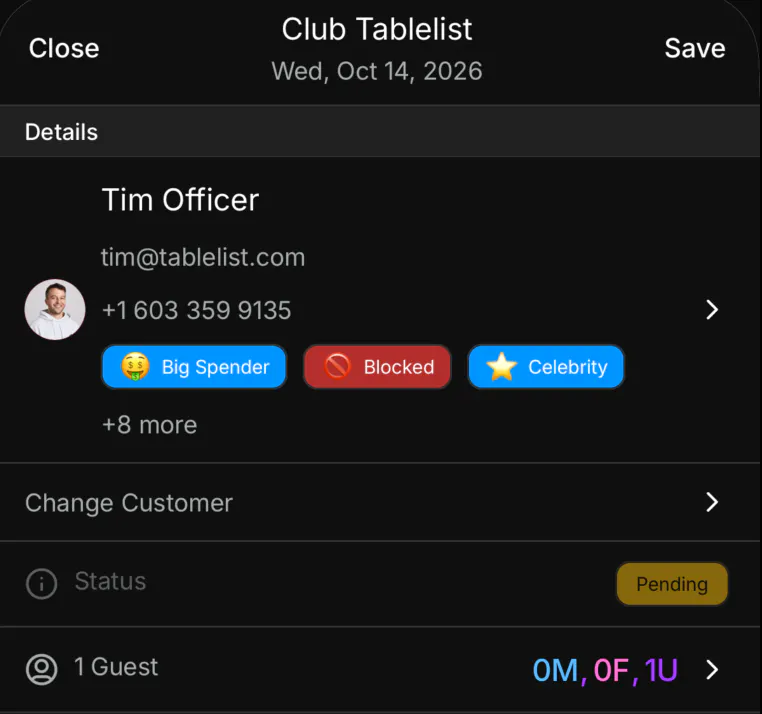
The form uses your venue name. Under Details, tap Change Customer and pick the guest. Tap the guest count to set male, female, and unisex. Choose the event and Date.
Under Booked By, choose who gets credit.
Under Table, set Minimum Spend or Minimum Bottles, Arrival Time, Location, and Server.
Under Other, leave Send confirmation email on if the guest should get one. Turn on Comped and pick a Comp Type if needed. Add Notes and Reservation Tags.
Tap Save.